Ingredients
- ▢ 250g / 8 oz salted butter, softened (2 x US sticks, 1 cup) (or unsalted + ¼ tsp salt)
- ▢ 3/4 cup (90g) icing sugar (powdered sugar) (Note 2)
- ▢ 2 cups (300g) plain / all purpose flour
Instructions
- Preheat oven to 160C/325F (standard) or 150C/300F (fan forced / convection).
- Butter and line a 31.5 x 23.5 cm / 9 x 13″ pan with baking paper with overhang.
- Beat butter until smooth (or use very soft butter and a wooden spoon). Add icing sugar and beat until combined.
- Add half the flour and beat until mostly combined – it will resemble wet sand. Then beat in the remainder. Use your hands to bring it together into a smooth ball of dough – knead lightly if required.
- Roughly press down into a rectangle shape, then transfer into the pan. Press into the pan. Optional: Roll over the top using a small rolling pin or glass (that’s what I used) for a smooth surface. Don’t press down too hard – it makes the cookies firmer
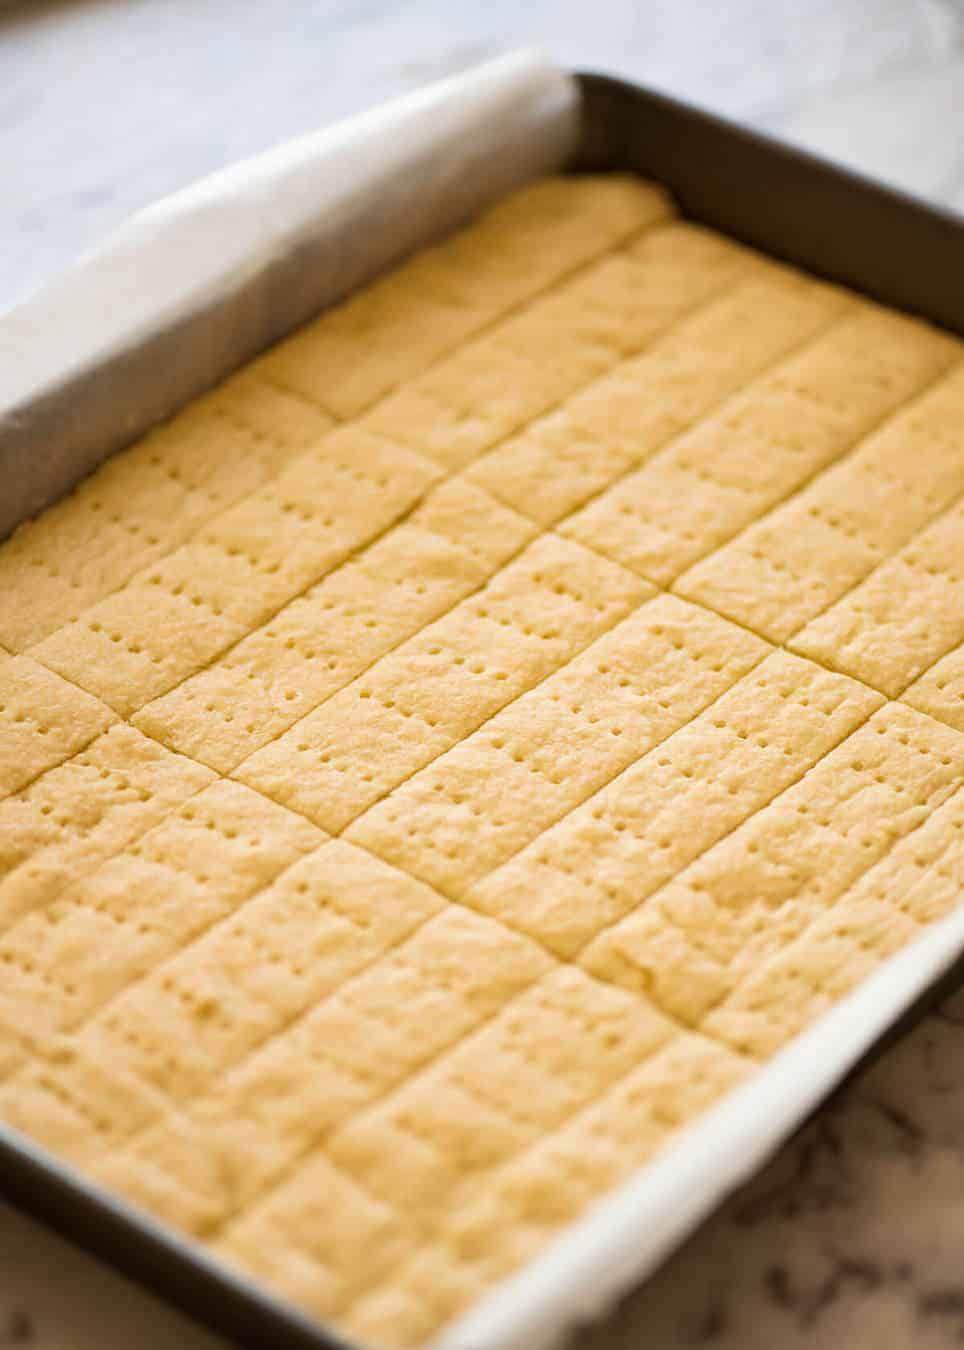
- Bake for 20 minutes until edges are very light golden and most of the surface is still pale gold.
- Remove from the oven. Working quickly, cut into desired shape (I do 8 x 3 bars, like Walker’s shortbread biscuits) and prick all over with a fork (optional).
- Return to the oven for 8 minutes or until the surface is light golden – not browned. Turn the oven off, crack it open ajar, then leave to cool for at least 1 hour in the oven.
- Remove from the oven, use paper overhang to remove the biscuits from the pan. Cool fully on rack. Serve with tea!!
- Partial cook before cutting and pricking (if you do when fully raw, the cuts/pricks disappear when baked);
- Cutting cooked biscuit has tendency to crack surface a bit – not as neat;
- Leave the shortbread in the oven to cool. This is a tip I picked up from Cooks’ Illustrated – it allows the biscuit to finish cooking without the surface browning (shortbread cookies should be very pale).
Recipe Notes:
1. RICE FLOUR: This recipe makes shortbread that’s tender enough as it is so you don’t need rice flour. You can use it if you want – the difference is marginal. Just swap out ¼ cup of the flour with rice flour, add it with the flour.Some recipes say you can use cornstarch/cornflour as well. I personally find this leaves a bit of a chalky taste.
2. SUGAR: I like to use icing sugar because the grains are finer so you get a smoother finish on the surface. Also icing sugar is about 1/2 the sweetness of sugar by volume.There are 2 types of icing sugar in Australia – Soft and Pure. Either works (I can’t tell difference in outcome) – I usually use Soft because it’s what I always have. The icing sugar can be substituted with 1/2 cup of white sugar, preferably caster/superfine sugar + 2 tbsp flour.
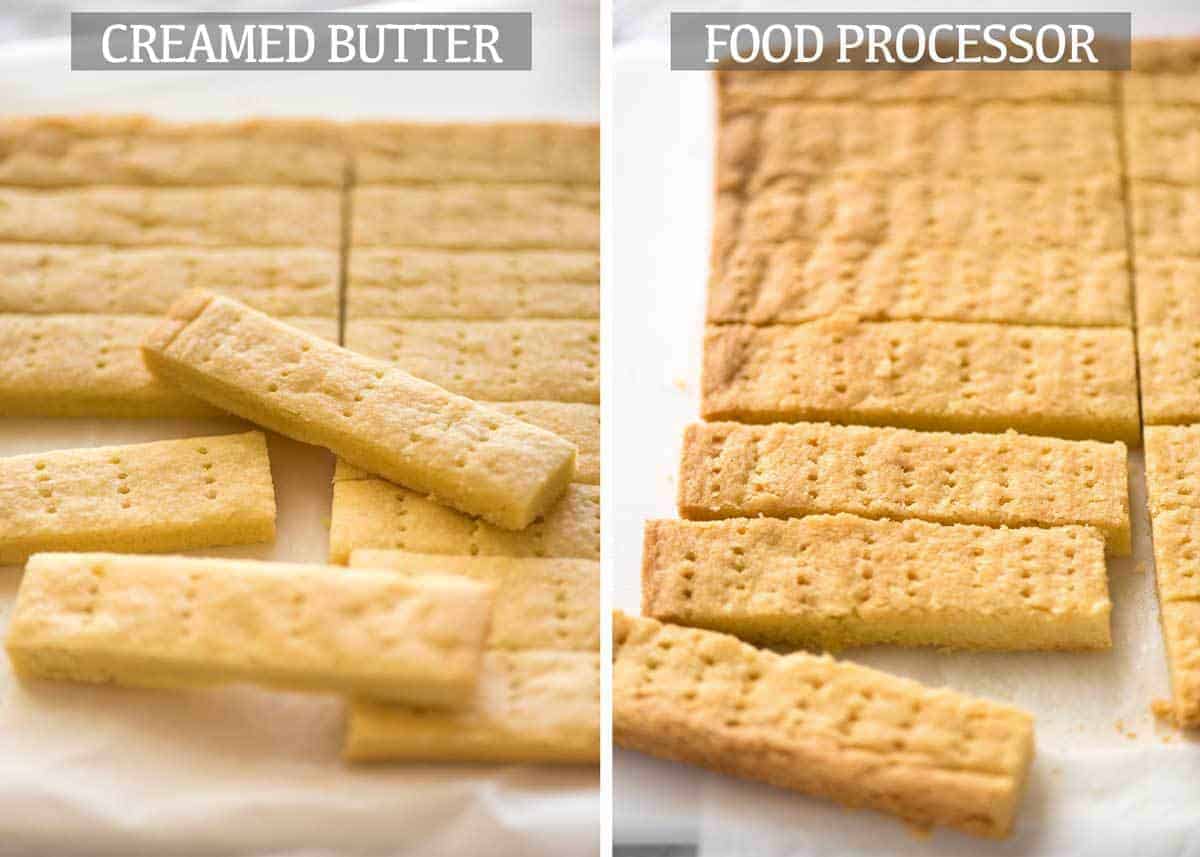
3. FOOD PROCESSOR / RUBBING BUTTER: Instead of creaming softened butter, the other method is to rub the butter in. This yields a more crumbly shortbread but the surface is rougher – see comparison photo in post. If you wish to use this method (which I believe is the original traditional method, think pre beater days!), this is how to do it:* Cut COLD butter into 1cm / 2/5” cubes;
* Food processor: place all the flour, sugar and butter in a food processor. Pulse 20 times, then whizz on high for 25 seconds until it forms breadcrumbs. Turn out onto work surface and proceed with recipe;
* Rubbing with fingers: Place all the flour and sugar in a bowl, then add butter. Use fingertips to rub butter into flour until it forms breadcrumbs (see video for how it should look). Turn out onto work surface and proceed with recipe.
4. HOT WEATHER WARNING! If it is super hot where you are and/or you have very hot hands with the butter rubbing method, press the dough into the pan then refrigerate for 20 minutes or until chilled.
5. PRECUTTING: To cut out into shapes before baking, it is best to add 2 tbsp flour to make a dough that won’t spread as much when baking. Then roll out into 1 cm / 2/5” thickness and cut into desired shape, place on a baking paper lined tray and refrigerate for 30 minutes. Preheat oven to 150C/300F (fan forced) or 170C/340F (standard) then bake for 15 minutes until the edges are just starting to the brown but the surface is still a pale gold.
6. METHOD NOTES:
- Partial cook before cutting and pricking (if you do when fully raw, the cuts/pricks disappear when baked);
- Cutting cooked biscuit has tendency to crack surface a bit – not as neat;
- Leave the shortbread in the oven to cool. This is a tip I picked up from Cooks’ Illustrated – it allows the biscuit to finish cooking without the surface browning (shortbread cookies should be very pale).
7. MEASURING CUPS IN DIFFERENT COUNTRIES: Shortbread is actually quite forgiving. I’ve tested this using both US and Australian measures and I couldn’t tell the difference.
8. Store in an airtight container for 3 days or in the freezer for up to 2 months.
NUTRITION INFORMATION:
Serving: 25g
Calories: 135cal (7%) Carbohydrates: 13g (4%) Protein: 1g (2%) Fat: 9g (14%) Saturated Fat: 5g (31%) Trans Fat: 1g Cholesterol: 22mg (7%) Sodium: 75mg (3%) Potassium: 16mg Fiber: 1g (4%) Sugar: 4g (4%) Vitamin A: 260IU (5%) Calcium: 4mg Iron: 1mg (6%)
Why is it called shortbread?
These cookies are called Shortbread because the term “short” is used to describe cookies and pastries with a tender, crumbly melt-in-your-mouth texture. The same terminology is used for shortcrust pastries used in things like Quiche and Pecan Pie.
It’s considered an art to achieve this buttery delicate texture – but it’s actually REALLY EASY!
How to make Shortbread Cookies
The trick with shortbread cookies to ensure they are melt-in-your-mouth as they should be is to ensure the dough is nice and crumbly! Here’s how to make shortbread cookies:
- creamy butter, then gradually beat in icing sugar and flour
- it will be crumbly (photo #3 below), use your hands to press together to form a smooth-dish ball, don’t knead
- now press the dough into a prepared shallow pan then using something to flatten the surface
- partially bake, then remove
- prick holes and slice, then bake again – this is the best way to achieve clean cuts and ensure the holes stay.
- cool for 1 hour in oven – this will finish cooking them whilst keeping the cookies pale golden as they should be (rather than browning on edges).
Rice flour or normal flour?
You may have read that shortbread cookies should be made with a combination of rice flour and normal flour, and sometimes you see recipes with cornflour (cornstarch).
Rice flour makes the shortbread a little more tender, but having made shortbread many times over the years both with and without using this shortbread recipe, I can honestly say that the difference is barely noticeable. A shortbread recipe with a tougher dough or calling for more kneading may NEED rice flour in order to achieve the right delicate texture. This recipe does not need rice flour.
Comparison of different methods
There’s a few different ways to make shortbread cookies:
- food processor – the fastest method. Blitz butter, flour and sugar, pat into pan and bake. This yields a shortbread with signature crumby texture, but the surface is quite rough, as pictured below. People who like very crumbly shortbread and do not mind about the rough surface use this technique;
- rubber COLD butter in with fingers – this yields almost the same result as using a food processor ie very crumbly shortbread, rough surface
- creamed SOFTENED butter using a beater or wooden spoon – this is the method I use. Still a beautifully delicate, crumbly shortbread, but the surface is smoother so it looks like the shortbread cookies that we all know and love!
I use the creamed butter method rather than rubbing in cold butter in this Shortbread Cookie recipe. Smoother surface, with the perfect delicate crumbly texture.