Posted on

Reflecting on a Season of Bush Sugar Bean Farming: Lessons Learned and Future Plans

As the gardening season draws to a close, it’s the perfect time to reflect on the journey of cultivating bush sugar beans and to start planning for the next growing cycle. Join us as we take a closer look at the successes, challenges, and valuable insights gained from our bean-growing adventure.

Celebrating Successes:
Looking back at the bush sugar bean harvest, we can’t help but celebrate the bountiful yields that our careful tending and nurturing produced. The sight of plump pods bursting with flavorful beans is a testament to the rewards of diligent care and attention. The well-structured rows and healthy plants stand as a visual representation of the hours invested in preparing the soil and providing optimal growing conditions.

Lessons from Challenges:
Of course, no gardening journey is without its challenges. Throughout the season, we encountered various obstacles that tested our skills and patience. We learned the importance of consistent watering, especially during the critical germination period, to ensure uniform growth and prevent stress on the plants. Additionally, vigilant pest management became a priority as we faced aphid infestations that reminded us of the delicate balance between the garden’s ecosystem and potential threats.

Exploring Companion Planting:
One intriguing aspect of our bush sugar bean farming experiment was the exploration of companion planting. Placing basil near the bean plants not only served as a culinary delight but also seemed to contribute to the overall health of the garden bed. The aromatic basil acted as a natural deterrent for some pests while enhancing the flavors of the dishes we prepared with our homegrown beans.

Planning for the Future:
As we bid farewell to this growing season, we’re already looking ahead to the next. Crop rotation is high on our list of priorities to maintain soil fertility and minimize the risk of disease. To follow our bush sugar beans, we’re considering planting nitrogen-fixing legumes that will enrich the soil and prepare it for future crops. This thoughtful planning ensures that the garden’s productivity remains vibrant year after year.

Expressing Gratitude:
We extend our heartfelt gratitude to the dedicated gardening community that has joined us on this journey. Your comments, questions, and shared experiences have enriched our learning process and added a sense of camaraderie to the adventure. Together, we’ve celebrated successes, brainstormed solutions, and celebrated the simple joy of growing our own food.

As we wrap up this season of bush sugar bean farming, we invite you to share your own reflections, triumphs, and lessons learned in the comments below. Let’s continue to inspire and learn from each other as we nurture our gardens and connect with the beauty of nature. Until next season, happy gardening and may your future bean harvests be as abundant as your enthusiasm!

Posted on

Strawberries Upward: The Vertical Farming Revolution

GroSpace - Strawberry planting vertical hydroponics

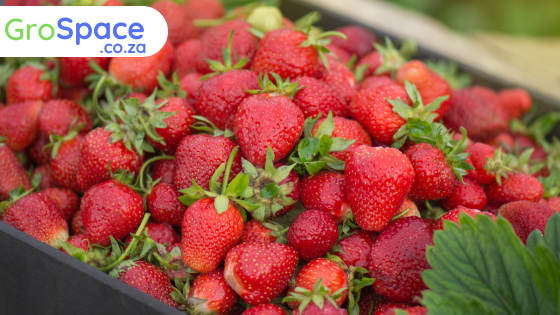
Strawberries, with their vibrant colors and juicy sweetness, have a way of brightening our day. But what if we told you that you could enjoy these delectable berries year-round, even in limited space? Welcome to the world of vertical strawberry farming, where innovation knows no bounds!

Growing Up, Not Out:

Vertical farming is a revolutionary approach that takes farming to new heights, quite literally. Instead of traditional horizontal fields, vertical farms use stacked layers or shelves to cultivate crops, including strawberries. This innovative technique provides numerous advantages, especially for space-challenged urban environments.

The Vertical Strawberry Timeline:

Now, let’s explore how vertical farming influences the growth timeline of strawberries:

1. Rapid Germination and Vegetative Growth: Vertical farms create ideal conditions for germination and vegetative growth. Controlled environments with optimized temperature, humidity, and lighting allow strawberry plants to sprout quickly and develop lush foliage and roots.

2. Efficient Use of Space: In vertical farming, space is a valuable commodity. Strawberries thrive in vertical towers or shelves, maximizing land use efficiency. You can grow a considerable number of strawberry plants in a relatively small footprint.

3. Year-Round Harvest: With vertical farming, the traditional constraints of seasons and weather conditions fade away. You can enjoy a year-round strawberry harvest, regardless of external factors.

4. Precise Control: Vertical farming offers precise control over environmental variables, including light, temperature, and nutrient delivery. This control can lead to consistent and bountiful yields.

5. Reduced Pest and Disease Pressure: Elevated growing spaces can be easier to monitor and protect against pests and diseases. Vertical farms often employ advanced pest management techniques, reducing the need for pesticides.

6. Minimal Water Usage: Vertical farms are designed for efficient water use. Hydroponic or aeroponic systems deliver nutrients directly to the plants, reducing water wastage.

7. Enhanced Pollination: Vertical farms can integrate advanced pollination techniques, such as automated systems or even drones, to ensure thorough and efficient pollination of strawberry blossoms.

8. Harvest at Your Fingertips: Vertical strawberry towers make harvesting a breeze. No more bending down or searching through foliage; the strawberries are conveniently at eye level.

A Greener Future:

Vertical strawberry farming aligns with the principles of sustainability. It reduces the need for long-distance transportation, minimizes resource consumption, and limits exposure to pesticides. It’s a step toward a greener, more efficient future of food production.

So, whether you’re a city dweller with limited garden space or a seasoned farmer exploring innovative solutions, vertical strawberry farming opens a world of possibilities. With year-round strawberries right at your fingertips, your love for these delightful berries knows no bounds. Welcome to the future of strawberry cultivation, where the sky’s the limit! 🍓🌆🌱

Posted on

The Sweet Science of Strawberry Farming: From Seed to Sumptuous Berry

If you’re a fan of succulent, juicy berries, then strawberries are likely high on your list of favorites. And if you’ve ever dabbled in gardening, you’ve probably wondered, “How long does it take for strawberries to grow?” Well, grab your gardening gloves and let’s dive into the fascinating journey of strawberry farming!

60 to 90 Days of Anticipation:

On average, it takes anywhere from 60 to 90 days for a strawberry plant to complete its transformation from a tiny seed to a luscious, ripe berry. However, the duration of this developing phase can vary, and here’s why:

Growing Conditions Matter:

Strawberries are nature’s perfectionists, and they’re quite sensitive to their surroundings. The time it takes for strawberries to grow depends on the growing conditions you provide:

  • Temperature: Warmer temperatures generally speed up the process. In cooler climates or during the winter months, growth may take longer.
  • Sunlight: Strawberries adore sunlight. Ample exposure to the sun can accelerate their growth and yield sweeter berries.
  • Soil Quality: Rich, well-draining soil that’s properly fertilized can provide the nutrients necessary for robust growth.
  • Watering: Consistent and adequate watering is essential. Dry spells can slow down the strawberry’s growth significantly.

Phases of Growth:

Understanding the phases of a strawberry plant’s growth can shed light on the timeline:

  1. Germination (7-14 days): It all begins with a tiny seed. During germination, the seed sprouts, forming the first leaves and roots.
  2. Vegetative Growth (2-4 weeks): The plant focuses on leaf production and root development during this phase.
  3. Flower Bud Formation (4-6 weeks): As the plant matures, it starts to form flower buds. These buds will eventually become strawberries.
  4. Flowering and Fruiting (2-3 weeks): The plant bursts into beautiful white flowers, which gradually transform into green fruit. As the berries ripen, they turn into the vibrant red strawberries we adore.
  5. Harvest (ongoing): Once the berries reach their full ripeness, it’s time to enjoy the fruits of your labor! Strawberries can continue to produce throughout the growing season.

Patience Rewarded:

While it might seem like a waiting game, the joy of watching your strawberry plants thrive and eventually yield plump, delicious berries is well worth it. And don’t forget, you can extend your strawberry season by planting multiple varieties that ripen at different times.

So, whether you’re a seasoned gardener or a newbie in the world of strawberry farming, understanding the growth timeline and the factors that influence it can help you cultivate a bumper crop of these delectable red gems. Happy strawberry growing! 🍓🌱🌞

Posted on

Chocolate Bar-One Cake

Bar One Chocolate recipe

Preparation Time: Approximately 15 minutes

Cook Time: 50 minutes

Serves: 8 portions / 1 cake

Description: this recipe is for a chocolate bar one cake it takes about 50 minutes to an hour and it’s an awesome recipe that people love.

A picturesque country setting with a bar one cake

Ingredients

  • 45ml cocoa powder
  • 80ml hot water
  • 150g butter or margarine, soften
  • 200g sugar
  • 3  eggs
  • 280g Snowflake Cake Wheat Flour
  • 15ml Snowflake Baking Powder
  • 3ml bicarbonate of soda
  • 2ml salt
  • 250ml buttermilk or plain yoghurt

For the icing:

55g Bar One, cut into pieces

100g dark chocolate, coarsely chopped

60ml fresh cream

45ml butter or margarine

Method

  • Mix cocoa powder and water until smooth and set aside to cool slightly.
  • Cream butter and sugar together. Add eggs, one at a time, beating well after each addition until light and creamy. Add cocoa powder mixture.
  • Sift flour, baking powder, bicarb and salt together and add, alternately with buttermilk, to creamed mixture.
  • Spoon mixture into a greased 23cm loose-bottom round cake pan. Bake in a preheated oven at 180°C for about 50 mins. Leave in pan for a few minutes before turning out onto a wire rack to cool completely.
  • To make the icing: Mix all the ingredients together in a small saucepan. Place over low heat until melted. Spoon over top of cake and leave to set. Decorate with extra chopped Bar One.
Posted on

Grafting Tomato onto Potato Rootstock: Exploring Different Methods for Success

Introduction:

Grafting is a fascinating technique that allows gardeners to combine the desirable traits of different plant species, resulting in improved disease resistance, higher yields, and enhanced vigor. One intriguing grafting approach involves uniting tomato scions with potato rootstock. In this guide, we’ll dive into the various grafting methods used to create this unique combination and explore the steps to ensure a successful fusion between these two plants.

Method 1: Whip-and-Tongue Grafting

Whip-and-tongue grafting is a popular technique for joining tomato scions and potato rootstock. Here’s how it’s done:

  1. Prepare the Scion and Rootstock: Select a healthy young tomato seedling (scion) and a potato plant (rootstock) with matching stem diameters. Cut both stems diagonally to create matching “tongues.”
  2. Join the Pieces: Insert the tongue of the tomato scion into the tongue of the potato rootstock, creating a snug fit. Use a sharp, clean grafting knife for precise cuts.
  3. Secure the Graft: Wrap the graft union with a rubber clip or grafting tape to hold the scion and rootstock together tightly. Ensure that no air gaps are present.
  4. Healing Period: Place the grafted plant in a humid environment for about a week to encourage successful union. A humidity dome or plastic bag can be used for this purpose.

Method 2: Cleft Grafting

Cleft grafting is another effective method for combining tomato and potato plants:

  1. Prepare the Rootstock: Cut the potato rootstock vertically to create a cleft or “V”-shaped opening.
  2. Insert the Scion: Trim the tomato scion to fit the cleft in the rootstock. Insert the scion into the cleft, ensuring a snug fit.
  3. Secure and Heal: Use grafting tape or rubber clips to secure the scion in place. Allow the grafted plant to heal in a humid environment.

Method 3: Side Grafting

Side grafting is a simpler method that works well for grafting smaller tomato scions onto potato rootstock:

  1. Select a Potato Shoot: Choose a potato shoot with the same diameter as the tomato scion.
  2. Make a T-shaped Incision: Make a horizontal cut at the top of the potato shoot, followed by a vertical cut to create a “T” shape.
  3. Insert the Scion: Trim the tomato scion to fit the T-shaped incision in the potato shoot. Slide the scion into the incision, creating a snug fit.
  4. Secure and Heal: Use grafting tape or rubber clips to hold the scion in place. Allow the grafted plant to heal in a humid environment.

Tips for Successful Grafting:

  1. Choose Healthy Plants: Both the tomato scion and potato rootstock should be healthy, disease-free, and of similar size.
  2. Use Clean Tools: Ensure your grafting knife is sharp and sanitized to make clean, precise cuts.
  3. Maintain Humidity: During the healing period, keep the grafted plants in a humid environment to encourage successful union.
  4. Monitor Growth: Once the graft has healed, monitor the growth of the combined plant. Trim any unwanted shoots that emerge from the rootstock.

Conclusion:

Grafting tomato onto potato rootstock is an exciting endeavor that combines the strengths of two distinct plants. By employing techniques like whip-and-tongue grafting, cleft grafting, or side grafting, gardeners can successfully create this unique fusion. With careful preparation, precise execution, and attention to healing conditions, you’ll unlock the potential of a tomato-potato hybrid that showcases the wonders of plant grafting. Experiment with different methods, refine your skills, and enjoy the rewards of a garden that bears testament to your grafting expertise.

Posted on

Unlocking Tomato-Potato Grafting: A Guide to Successful Grafting, Management, and Bountiful Harvest

Introduction:

Grafting has long been a horticultural technique used to combine the strengths of different plants, and when it comes to tomatoes and potatoes, the fusion is a match made in gardening heaven. By grafting tomatoes onto potato rootstock, you can unlock a world of benefits – from enhanced disease resistance to increased vigor. Join us as we delve into the fascinating process, careful management, and the joyous harvest that comes with this unique gardening endeavor.

The Grafting Process:

Step 1: Selecting Your Varieties
Choose a tomato variety known for its superior fruit quality and a potato rootstock that exhibits strong disease resistance and vigorous growth. Popular tomato selections include heirlooms like “Brandywine” or hybrids like “Big Beef,” while hardy potato varieties like “Desiree” or “Kennebec” are excellent rootstock candidates.

Step 2: Preparing the Seedlings
Start tomato and potato seedlings simultaneously. When the tomato seedlings are around 10-14 days old and the potato seedlings have just begun to sprout, they’re ready for grafting. Ensure both sets of seedlings are healthy and disease-free.

Step 3: Grafting Technique
Make a clean diagonal cut on the tomato scion (top) and a corresponding diagonal cut on the potato rootstock (bottom). Join the two sections by pressing the cut surfaces together firmly. Use a rubber clip or grafting clip to hold them in place.

Step 4: Healing Period
Place the grafted plants in a high-humidity environment, such as a humidity dome or a plastic bag, for about 7-10 days. This encourages successful healing and fusion between the scion and rootstock.

Management and Care:

  1. Transplanting: Once the graft has healed, transplant the grafted tomato-potato plants into their final growing location. Choose a sunny spot with well-draining soil and prepare the bed with compost and organic matter.
  2. Staking and Support: As the grafted plants grow, provide sturdy support using stakes or trellises. Beefsteak tomatoes can become quite heavy, so ensuring proper support is crucial.
  3. Watering: Maintain consistent moisture levels in the soil to prevent stress on the grafted plants. Mulching can help retain moisture and regulate temperature.
  4. Fertilization: Apply a balanced organic fertilizer to provide essential nutrients for both tomato and potato components of the plant.
  5. Pruning: Regularly prune suckers and side shoots to redirect energy towards fruit development. Remember that both tomato and potato portions of the plant will produce foliage, so manage the growth accordingly.

Harvesting the Bounty:

As the growing season progresses, you’ll notice the grafted plants flourishing with a unique blend of tomato and potato growth. When it’s time to harvest, follow these guidelines:

  1. Tomatoes: Harvest tomatoes when they reach full color and are firm but not overly ripe. Gently twist or use pruning shears to remove them from the plant.
  2. Potatoes: As the tomato plant grows, you’ll also find potato tubers forming beneath the soil. Wait until the tomato vines start to die back, indicating that the potatoes are mature. Carefully dig around the root area to unearth the potatoes.

Conclusion:

Grafting tomatoes onto potato rootstock is a gardening adventure that offers a host of benefits, from disease resistance to increased yield. Through careful selection, proper grafting techniques, and diligent management, you’ll witness the union of two remarkable plants that thrive together. As you savor the flavor of your homegrown tomatoes and potatoes, you’ll experience the satisfaction of a successful grafting experiment that adds a unique touch to your garden and your table. So, roll up your sleeves, embrace the fusion of tomato and potato, and enjoy a bountiful harvest that’s truly a testament to the art and science of horticulture.

Posted on

Mastering Grafting: Boosting Cucumber Strength with Squash Roots

This writeup was prepared based on the following informative video:

Gardening is often a dance of innovation and experimentation. One fascinating technique that has gained popularity is grafting cucumbers onto squash rootstocks. This intriguing process offers a range of benefits, particularly in enhancing the cucumber’s tolerance to low temperatures, especially when it comes to chilly soil conditions. Join us in unraveling the secrets of grafting cucumbers onto squash rootstocks using the “one cotyledon” or splice grafting method.

Tools of the Grafting Trade:
To embark on this journey, let’s familiarize ourselves with the tools that will facilitate the grafting process:

  • Grafting Clips: These nifty little contraptions are aptly called side grafting clips. Unlike their tube grafting counterparts used for tomatoes, these clips come in various shapes and colors.
  • Razor Blade: Just as we utilized it for tomatoes, a razor blade is the instrument of choice for precise cutting during grafting.
  • Plastic Tubes: These tubes play a crucial role in holding the newly grafted plants together after the procedure. You’ll witness their significance shortly.

The Cotyledon Cut:
The initial step in our grafting endeavor involves snipping off one of the cotyledons (often referred to as leaves) from the rootstock. Furthermore, all the true leaves should be meticulously removed. Here’s a crucial detail: pay special attention to eliminating the apical meristem tissue, which consists of undifferentiated cells at the base of the axillary bud. If this tissue isn’t entirely removed, the shoots of the rootstocks will take over and outgrow the scion shoots, ultimately leading to a substantial reduction in the yield of scion plants.

Take a glance at three rootstock plants. In the first, the axillary bud remains, resulting in rootstock shoots sprouting. In the second, although no visible axillary bud is present, there’s still a slim chance of rootstock regrowth. The third plant, however, exhibits minimal chances of rootstock regrowth, demonstrating the significance of removing apical meristematic cells.

The Art of Grafting: One Cotyledon Method:
Now, let’s delve into the intricate process of grafting using the one cotyledon or splice grafting technique. Here’s a step-by-step breakdown:

  1. Cut the hypocotyl of the scion plant at an angle, mirroring the cutting angle of the rootstock.
  2. Meticulously align the two cut surfaces and secure them in place using a grafting clip.

A Timely Union:
Timing is of the essence in grafting. Make sure to attach and tighten the scion and rootstock cutting surfaces before they have a chance to dry out, which could occur within a matter of minutes. It’s advisable to complete the grafting process for one plant before moving on to the next. Avoid cutting multiple rootstocks and scions separately and then attempting to attach the surfaces.

Size Matters:
Ideally, the splice grafting method works best when both rootstock and scion plants have similar stem diameters. However, practicality sometimes requires adapting to differing sizes. Keep in mind that if your rootstock’s stems have developed significant hollow areas, don’t wait—proceed with grafting.

A Gentle Support:
Once the grafting is complete, provide support to the grafted plants using a small plastic straw inserted through the clip. Avoid wooden stakes, as they may become a breeding ground for mold under high humidity conditions, compromising the healing process.

Caring for Grafted Cucumber Plants:
The journey doesn’t end with the grafting process. Grafted cucumber plants require a warm and humid environment for healing. Ensuring optimal conditions during this phase will set the stage for robust and thriving plants.

Incorporating the “one cotyledon” or splice grafting method into your gardening repertoire opens the door to a world of possibilities. As you navigate through this technique, you’ll not only witness the fascinating union of cucumbers and squash but also unlock the potential for heartier, more resilient plants that thrive even in challenging temperature conditions. Happy grafting!

Posted on

Cultivating Bush Sugar Beans: A Comprehensive Step-by-Step Guide

Welcome to our in-depth series on the art of cultivating bush sugar beans, where we unlock the secrets to a bountiful harvest and share the joy of growing your own delicious and nutritious legumes. This multi-part guide will take you through every stage of the journey, from preparing the ground to savoring your homegrown beans on your plate. Let’s dive into the details!

Part 1: Preparing the Ground

Before you embark on your bean-growing adventure, it’s essential to create the ideal environment for your plants to thrive. Here’s how:

Selecting the Right Location: Choose a sunny spot in your garden that receives at least 6 to 8 hours of direct sunlight daily. Good air circulation is also crucial to prevent diseases, so avoid areas with heavy shade or crowded plantings.

Soil Preparation: Begin by clearing the designated area of any debris, weeds, and rocks. Loosen the soil to a depth of 6 to 8 inches using a garden fork or tiller. This will ensure that the roots can easily penetrate the soil and access essential nutrients.

Soil Enrichment: To create a nutrient-rich foundation for your beans, enrich the soil with well-rotted compost or aged manure. Work the organic matter into the soil thoroughly to improve drainage and water retention.

pH Balance: Test the soil’s pH level using a soil testing kit. Bush sugar beans thrive in slightly acidic to neutral soil with a pH range of 6.0 to 7.0. Adjust the pH if needed by adding lime to raise it or sulfur to lower it.

Creating Rows or Mounds: Depending on your gardening style and available space, create rows or mounds for planting. Rows should be spaced 18 to 24 inches apart, while mounds should be 2 to 3 feet apart. These configurations accommodate the bushy growth habit of sugar beans.

Stay tuned for Part 2, where we delve into the exciting process of planting and nurturing your bush sugar beans, from sowing the seeds to ensuring healthy growth.


Part 2: Planting and Nurturing

Now that your ground is ready, it’s time to bring your bush sugar beans to life. Here’s how to ensure a successful planting and nurturing process:

Sowing Seeds: When the soil has warmed up after the last frost, sow the sugar bean seeds about 1 to 2 inches deep and 2 to 4 inches apart within your chosen rows or mounds. Pat the soil gently over the seeds to secure them in place.

Watering: Keep the soil consistently moist during the germination period. Water gently to avoid disturbing the seeds. As the seedlings emerge, reduce the frequency of watering while ensuring the soil remains evenly moist.

Providing Support: While bush sugar beans are compact, providing support can protect them from adverse weather conditions. Place stakes or small trellises near the plants to give them stability as they grow.

Fertilization: Bush sugar beans have the unique ability to fix nitrogen from the air, reducing the need for excessive nitrogen fertilization. Incorporate a balanced fertilizer during planting to provide essential nutrients for robust growth.

Weed Management: Regularly remove weeds from the bean bed to prevent them from competing with your sugar beans for nutrients, water, and sunlight. Be cautious while weeding to avoid disturbing the shallow root system.

Pest and Disease Control: Monitor your bean plants for common pests like aphids and bean beetles. Introduce beneficial insects or use natural insecticidal soap to manage infestations. Adequate spacing and good air circulation also help prevent diseases.

Harvesting: Enjoy the fruits of your labor when the bean pods are plump and the beans inside have fully developed. Harvest every 2 to 3 days to encourage continuous production. Gently snap the pods off the plants to avoid damaging the stems.

Stay tuned for Part 3, where we explore the art of harvesting and preserving bush sugar beans, ensuring you can savor the taste of your homegrown beans long after the growing season.


Part 3: Harvesting and Preserving Your Bounty

As your bush sugar beans flourish, it’s time to reap the rewards of your hard work. Here’s how to ensure a successful harvest and preserve your flavorful harvest:

Harvesting Beans: When the pods are plump and the beans inside have reached their peak size, it’s time to harvest. Gently grasp each pod and snap it off the plant. Regular harvesting promotes continuous production.

Preserving Beans: If you find yourself with more beans than you can enjoy immediately, consider preserving them. One effective method is blanching and freezing. Blanch the beans in boiling water for a couple of minutes, then transfer them to an ice bath to stop cooking. Once cooled, drain and pack the beans into airtight containers before freezing.

Seed Saving: To continue your bean-growing journey, allow a few pods to fully mature and dry on the plant. Once dry, remove the beans from the pods and store them in labeled envelopes in a cool, dry place. These saved seeds will serve as the foundation for next year’s bean

crop.

Culinary Exploration: With your freshly harvested bush sugar beans in hand, it’s time to get creative in the kitchen. These versatile beans can be used in a variety of dishes, from salads and stir-fries to soups and stews. Their crisp texture and delicate flavor make them a delightful addition to any meal.

Reflection and Future Planning: Take a moment to reflect on your bean-growing journey. Consider what went well, what challenges you faced, and how you can improve next season. Remember to practice crop rotation to maintain soil health and prevent disease buildup.

Congratulations on successfully cultivating bush sugar beans from start to finish! Your dedication and effort have resulted in a delicious and nutritious reward. We hope this comprehensive guide has empowered you to become a confident and skilled bean grower. May your future bean harvests be abundant and your culinary creations unforgettable. Happy gardening!

Posted on

From Harvest to Renewal: Planning Your Next Successive Crops

Greetings, avid gardeners! As we traverse the ever-changing landscape of our garden bed, a fresh chapter of growth beckons. In our previous installments, we reveled in the magic of cultivating a diverse garden bed, featuring tomatoes, melons, sugar beans, and basil. Today, let’s delve deeper into the enchanting realm of successive crops, paying heed to disease prevention, nutrient orchestration, and the delicate symphony of nature’s dance.

Handpicking Your Successive Crops:

As your garden bed gently embraces the legacy of the previous season, a canvas of possibility stretches before you. The art of choosing successive crops is akin to crafting a melodic masterpiece—rooted in practicality yet adorned with strokes of creativity.

Harmonizing with Health: Disease prevention is a maestro’s key note. As the curtains fall on your last act, rotate your crops to thwart the rise of soil-borne adversaries. This dance between tomatoes and melons, now comes the encore, introducing crops from a different botanical tune.

Cultivating Nutrient Refinement: Each plant has its own nutritional rhythm. To conduct a harmonious nutrient orchestra, follow nitrogen-rich performers like sugar beans with starlets that demand a richer tune. Introduce nutrient-hungry protagonists like kale and broccoli to the stage, allowing them to flourish with the legacy of leguminous actors.

Balancing the Garden Opera: Embrace the magic of companion planting, an intricate ballet of interdependence. To repel unwanted pests and entice benevolent pollinators, sow the seeds of marigold and nasturtium alongside your next ensemble. This vibrant display nurtures harmony in your garden symphony.

Suggested Successive Crops:

  1. Leafy Luxuries: As autumn’s curtain rises, introduce the grace of leafy greens—spinach, Swiss chard, and arugula. Their verdant splendor paints a tapestry of nutrition and flavor, aligning gracefully with the aromatic basil that adorns the garden’s edge.
  2. Roots Unearthed: Following the leafy crescendo, welcome root vegetables to the stage. Carrots, radishes, and beets take center stage, tapping into the enriched soil beneath the trellised melody of tomatoes and melons.
  3. Cabbage Chronicles: The plot thickens as brassicas enter the scene—broccoli, cauliflower, and Brussels sprouts. These protagonists, members of the cabbage family, contribute to disease prevention through their captivating choreography of crop rotation.

Practical Guiding Stars:

  1. Soil Serenades: As you prepare for the next performance, compose a prelude of compost or well-aged manure to ensure the soil’s harmonious resonance.
  2. Symmetry in Spacing: Pay heed to the spacing choreography of your chosen crops. Proper spacing orchestrates a dance of adequate airflow, diminishing the risk of discordant diseases.
  3. Mulch’s Melody: A harmonious symphony requires resonance. Mulch takes on the role of conductor, harmonizing moisture, temperature, and weed crescendos. This virtuoso act enlivens the soil’s composition.
  4. Guardians of Harmony: The rhythm of integrated pest management (IPM) is essential. Nurture beneficial insects, practice vigilant surveillance, and conduct the symphony with precision, thwarting the pest cacophony.
  5. Watchful Maestros: Keep a vigilant eye on your verdant masterpiece. Nurture each stanza and note, addressing any concerns in real-time for a harmonious garden.

Curtain Call and Fresh Beginnings:

As you step onto the stage of successive crops, recall that each planting cycle is a passage of renewal and transformation. By selecting crops judiciously, emphasizing disease resilience, and nurturing the delicate balance of nutrients, you’re not merely gardening—you’re composing a garden symphony.

Allow the seasons to guide your cadence and past harvests to infuse wisdom into your journey. As you sow the seeds of your successive crops, envision the forthcoming harvest’s abundance and gastronomic treasures. Until we meet again, fellow gardeners, may your soil sing with vibrancy, your plants flourish, and your connection to the earth deepen—a harmonious ode to growth. Happy planting!

Posted on

From Harvest to Renewal: Planning Your Next Successive Crops

Hello, dedicated gardeners! As the wheel of the seasons turns once more, it’s time to embark on a new chapter in your garden bed’s journey. In our previous posts, we explored the art of cultivating a diverse and fruitful garden bed, from tomatoes and melons to sugar beans and basil. Now, let’s delve into the exciting world of successive crops, focusing on disease prevention, nutrient requirements, and the delicate balance of nature.

Selecting Your Successive Crops:

As you bid farewell to the remnants of your summer harvest, a blank canvas lies before you, ready to be adorned with a new tapestry of flavors. The art of selecting successive crops involves a harmonious blend of pragmatism and creativity.

Disease Prevention: One of the key principles in successive cropping is to minimize the risk of diseases that may have affected the previous crops. Consider rotating crops to prevent the buildup of soil-borne pathogens and pests. For instance, avoid planting crops from the same family as your previous tomatoes to reduce the risk of soilborne diseases that may affect both crops.

Nutrient Requirements: Different crops have varying nutrient needs. To maintain soil fertility and balance, follow nitrogen-fixing crops like legumes (beans or peas) with heavy feeders like leafy greens (lettuce, spinach), which benefit from the nitrogen left behind by the legumes. This practice replenishes nutrients naturally, reducing the need for synthetic fertilizers.

Balancing the Ecosystem: Embrace the principle of companion planting to create a balanced ecosystem in your garden bed. Companion plants can deter pests, enhance pollination, and contribute to overall soil health. For instance, planting aromatic herbs like rosemary, sage, or dill alongside your new crops can help repel unwanted insects and add culinary delights to your table.

Successive Crop Ideas:

  1. Leafy Greens: As the cool embrace of fall settles in, welcome leafy greens to your garden bed. Spinach, kale, and Swiss chard thrive in this season. Their vibrant leaves bring color and nutrition to your table, and they harmonize well with the aromatic basil that remains on the edges of your bed.
  2. Root Vegetables: Follow your leafy greens with root vegetables like carrots, radishes, and beets. These crops make excellent use of the nutrients left behind by the previous plants and benefit from the well-drained soil beneath your melon and tomato trellises.
  3. Cabbage Family: Introduce members of the cabbage family, such as broccoli, cauliflower, and Brussels sprouts. These nutrient-rich crops not only add diversity to your garden bed but also contribute to disease prevention through crop rotation.

Practical Tips for Success:

  1. Soil Preparation: As you prepare your garden bed for the next set of crops, amend the soil with compost or well-rotted manure to ensure a nutrient-rich foundation.
  2. Spacing: Pay attention to the spacing requirements of your chosen crops. Adequate spacing allows for proper airflow and minimizes the risk of diseases.
  3. Mulching: Apply a layer of organic mulch to conserve moisture, regulate soil temperature, and suppress weed growth. Mulching also contributes to soil health as it breaks down over time.
  4. Pest Management: Implement integrated pest management (IPM) strategies, such as regular scouting for pests, encouraging beneficial insects, and practicing proper sanitation to reduce the risk of pest infestations.
  5. Observation: Continuously observe your garden bed, noting any changes in plant health or growth. Early detection of issues allows for prompt intervention and a healthier garden.

In Closing: A Garden’s Renewal:

As you embark on this new phase of your garden’s journey, remember that each planting cycle is an opportunity for renewal and growth. By carefully selecting successive crops, prioritizing disease prevention, and nurturing the delicate balance of nutrients, you’re not just cultivating a garden bed – you’re fostering a thriving ecosystem.

With the seasons as your guide and the lessons from past harvests in your heart, may your garden bed continue to flourish and evolve. As you sow the seeds of your successive crops, envision the abundant harvests and culinary delights that lie ahead. Until next time, fellow gardeners, may your soil be rich, your plants resilient, and your connection to the land deep and meaningful. Happy planting!