Posted on

Strawberries Upward: The Vertical Farming Revolution

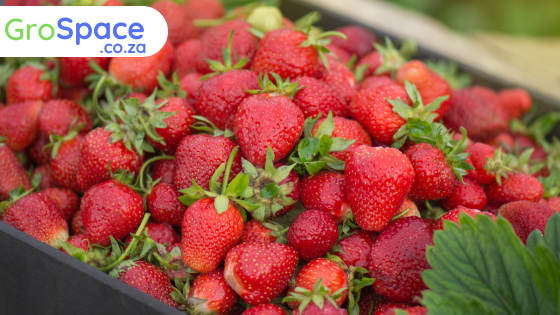
GroSpace - Strawberry planting vertical hydroponics

Strawberries, with their vibrant colors and juicy sweetness, have a way of brightening our day. But what if we told you that you could enjoy these delectable berries year-round, even in limited space? Welcome to the world of vertical strawberry farming, where innovation knows no bounds!

Growing Up, Not Out:

Vertical farming is a revolutionary approach that takes farming to new heights, quite literally. Instead of traditional horizontal fields, vertical farms use stacked layers or shelves to cultivate crops, including strawberries. This innovative technique provides numerous advantages, especially for space-challenged urban environments.

The Vertical Strawberry Timeline:

Now, let’s explore how vertical farming influences the growth timeline of strawberries:

1. Rapid Germination and Vegetative Growth: Vertical farms create ideal conditions for germination and vegetative growth. Controlled environments with optimized temperature, humidity, and lighting allow strawberry plants to sprout quickly and develop lush foliage and roots.

2. Efficient Use of Space: In vertical farming, space is a valuable commodity. Strawberries thrive in vertical towers or shelves, maximizing land use efficiency. You can grow a considerable number of strawberry plants in a relatively small footprint.

3. Year-Round Harvest: With vertical farming, the traditional constraints of seasons and weather conditions fade away. You can enjoy a year-round strawberry harvest, regardless of external factors.

4. Precise Control: Vertical farming offers precise control over environmental variables, including light, temperature, and nutrient delivery. This control can lead to consistent and bountiful yields.

5. Reduced Pest and Disease Pressure: Elevated growing spaces can be easier to monitor and protect against pests and diseases. Vertical farms often employ advanced pest management techniques, reducing the need for pesticides.

6. Minimal Water Usage: Vertical farms are designed for efficient water use. Hydroponic or aeroponic systems deliver nutrients directly to the plants, reducing water wastage.

7. Enhanced Pollination: Vertical farms can integrate advanced pollination techniques, such as automated systems or even drones, to ensure thorough and efficient pollination of strawberry blossoms.

8. Harvest at Your Fingertips: Vertical strawberry towers make harvesting a breeze. No more bending down or searching through foliage; the strawberries are conveniently at eye level.

A Greener Future:

Vertical strawberry farming aligns with the principles of sustainability. It reduces the need for long-distance transportation, minimizes resource consumption, and limits exposure to pesticides. It’s a step toward a greener, more efficient future of food production.

So, whether you’re a city dweller with limited garden space or a seasoned farmer exploring innovative solutions, vertical strawberry farming opens a world of possibilities. With year-round strawberries right at your fingertips, your love for these delightful berries knows no bounds. Welcome to the future of strawberry cultivation, where the sky’s the limit! 🍓🌆🌱

Posted on

Unlocking Tomato-Potato Grafting: A Guide to Successful Grafting, Management, and Bountiful Harvest

Introduction:

Grafting has long been a horticultural technique used to combine the strengths of different plants, and when it comes to tomatoes and potatoes, the fusion is a match made in gardening heaven. By grafting tomatoes onto potato rootstock, you can unlock a world of benefits – from enhanced disease resistance to increased vigor. Join us as we delve into the fascinating process, careful management, and the joyous harvest that comes with this unique gardening endeavor.

The Grafting Process:

Step 1: Selecting Your Varieties
Choose a tomato variety known for its superior fruit quality and a potato rootstock that exhibits strong disease resistance and vigorous growth. Popular tomato selections include heirlooms like “Brandywine” or hybrids like “Big Beef,” while hardy potato varieties like “Desiree” or “Kennebec” are excellent rootstock candidates.

Step 2: Preparing the Seedlings
Start tomato and potato seedlings simultaneously. When the tomato seedlings are around 10-14 days old and the potato seedlings have just begun to sprout, they’re ready for grafting. Ensure both sets of seedlings are healthy and disease-free.

Step 3: Grafting Technique
Make a clean diagonal cut on the tomato scion (top) and a corresponding diagonal cut on the potato rootstock (bottom). Join the two sections by pressing the cut surfaces together firmly. Use a rubber clip or grafting clip to hold them in place.

Step 4: Healing Period
Place the grafted plants in a high-humidity environment, such as a humidity dome or a plastic bag, for about 7-10 days. This encourages successful healing and fusion between the scion and rootstock.

Management and Care:

  1. Transplanting: Once the graft has healed, transplant the grafted tomato-potato plants into their final growing location. Choose a sunny spot with well-draining soil and prepare the bed with compost and organic matter.
  2. Staking and Support: As the grafted plants grow, provide sturdy support using stakes or trellises. Beefsteak tomatoes can become quite heavy, so ensuring proper support is crucial.
  3. Watering: Maintain consistent moisture levels in the soil to prevent stress on the grafted plants. Mulching can help retain moisture and regulate temperature.
  4. Fertilization: Apply a balanced organic fertilizer to provide essential nutrients for both tomato and potato components of the plant.
  5. Pruning: Regularly prune suckers and side shoots to redirect energy towards fruit development. Remember that both tomato and potato portions of the plant will produce foliage, so manage the growth accordingly.

Harvesting the Bounty:

As the growing season progresses, you’ll notice the grafted plants flourishing with a unique blend of tomato and potato growth. When it’s time to harvest, follow these guidelines:

  1. Tomatoes: Harvest tomatoes when they reach full color and are firm but not overly ripe. Gently twist or use pruning shears to remove them from the plant.
  2. Potatoes: As the tomato plant grows, you’ll also find potato tubers forming beneath the soil. Wait until the tomato vines start to die back, indicating that the potatoes are mature. Carefully dig around the root area to unearth the potatoes.

Conclusion:

Grafting tomatoes onto potato rootstock is a gardening adventure that offers a host of benefits, from disease resistance to increased yield. Through careful selection, proper grafting techniques, and diligent management, you’ll witness the union of two remarkable plants that thrive together. As you savor the flavor of your homegrown tomatoes and potatoes, you’ll experience the satisfaction of a successful grafting experiment that adds a unique touch to your garden and your table. So, roll up your sleeves, embrace the fusion of tomato and potato, and enjoy a bountiful harvest that’s truly a testament to the art and science of horticulture.

Posted on

Cultivating Bush Sugar Beans: A Comprehensive Step-by-Step Guide

Welcome to our in-depth series on the art of cultivating bush sugar beans, where we unlock the secrets to a bountiful harvest and share the joy of growing your own delicious and nutritious legumes. This multi-part guide will take you through every stage of the journey, from preparing the ground to savoring your homegrown beans on your plate. Let’s dive into the details!

Part 1: Preparing the Ground

Before you embark on your bean-growing adventure, it’s essential to create the ideal environment for your plants to thrive. Here’s how:

Selecting the Right Location: Choose a sunny spot in your garden that receives at least 6 to 8 hours of direct sunlight daily. Good air circulation is also crucial to prevent diseases, so avoid areas with heavy shade or crowded plantings.

Soil Preparation: Begin by clearing the designated area of any debris, weeds, and rocks. Loosen the soil to a depth of 6 to 8 inches using a garden fork or tiller. This will ensure that the roots can easily penetrate the soil and access essential nutrients.

Soil Enrichment: To create a nutrient-rich foundation for your beans, enrich the soil with well-rotted compost or aged manure. Work the organic matter into the soil thoroughly to improve drainage and water retention.

pH Balance: Test the soil’s pH level using a soil testing kit. Bush sugar beans thrive in slightly acidic to neutral soil with a pH range of 6.0 to 7.0. Adjust the pH if needed by adding lime to raise it or sulfur to lower it.

Creating Rows or Mounds: Depending on your gardening style and available space, create rows or mounds for planting. Rows should be spaced 18 to 24 inches apart, while mounds should be 2 to 3 feet apart. These configurations accommodate the bushy growth habit of sugar beans.

Stay tuned for Part 2, where we delve into the exciting process of planting and nurturing your bush sugar beans, from sowing the seeds to ensuring healthy growth.


Part 2: Planting and Nurturing

Now that your ground is ready, it’s time to bring your bush sugar beans to life. Here’s how to ensure a successful planting and nurturing process:

Sowing Seeds: When the soil has warmed up after the last frost, sow the sugar bean seeds about 1 to 2 inches deep and 2 to 4 inches apart within your chosen rows or mounds. Pat the soil gently over the seeds to secure them in place.

Watering: Keep the soil consistently moist during the germination period. Water gently to avoid disturbing the seeds. As the seedlings emerge, reduce the frequency of watering while ensuring the soil remains evenly moist.

Providing Support: While bush sugar beans are compact, providing support can protect them from adverse weather conditions. Place stakes or small trellises near the plants to give them stability as they grow.

Fertilization: Bush sugar beans have the unique ability to fix nitrogen from the air, reducing the need for excessive nitrogen fertilization. Incorporate a balanced fertilizer during planting to provide essential nutrients for robust growth.

Weed Management: Regularly remove weeds from the bean bed to prevent them from competing with your sugar beans for nutrients, water, and sunlight. Be cautious while weeding to avoid disturbing the shallow root system.

Pest and Disease Control: Monitor your bean plants for common pests like aphids and bean beetles. Introduce beneficial insects or use natural insecticidal soap to manage infestations. Adequate spacing and good air circulation also help prevent diseases.

Harvesting: Enjoy the fruits of your labor when the bean pods are plump and the beans inside have fully developed. Harvest every 2 to 3 days to encourage continuous production. Gently snap the pods off the plants to avoid damaging the stems.

Stay tuned for Part 3, where we explore the art of harvesting and preserving bush sugar beans, ensuring you can savor the taste of your homegrown beans long after the growing season.


Part 3: Harvesting and Preserving Your Bounty

As your bush sugar beans flourish, it’s time to reap the rewards of your hard work. Here’s how to ensure a successful harvest and preserve your flavorful harvest:

Harvesting Beans: When the pods are plump and the beans inside have reached their peak size, it’s time to harvest. Gently grasp each pod and snap it off the plant. Regular harvesting promotes continuous production.

Preserving Beans: If you find yourself with more beans than you can enjoy immediately, consider preserving them. One effective method is blanching and freezing. Blanch the beans in boiling water for a couple of minutes, then transfer them to an ice bath to stop cooking. Once cooled, drain and pack the beans into airtight containers before freezing.

Seed Saving: To continue your bean-growing journey, allow a few pods to fully mature and dry on the plant. Once dry, remove the beans from the pods and store them in labeled envelopes in a cool, dry place. These saved seeds will serve as the foundation for next year’s bean

crop.

Culinary Exploration: With your freshly harvested bush sugar beans in hand, it’s time to get creative in the kitchen. These versatile beans can be used in a variety of dishes, from salads and stir-fries to soups and stews. Their crisp texture and delicate flavor make them a delightful addition to any meal.

Reflection and Future Planning: Take a moment to reflect on your bean-growing journey. Consider what went well, what challenges you faced, and how you can improve next season. Remember to practice crop rotation to maintain soil health and prevent disease buildup.

Congratulations on successfully cultivating bush sugar beans from start to finish! Your dedication and effort have resulted in a delicious and nutritious reward. We hope this comprehensive guide has empowered you to become a confident and skilled bean grower. May your future bean harvests be abundant and your culinary creations unforgettable. Happy gardening!

Posted on

From Harvest to Renewal: Planning Your Next Successive Crops

Greetings, avid gardeners! As we traverse the ever-changing landscape of our garden bed, a fresh chapter of growth beckons. In our previous installments, we reveled in the magic of cultivating a diverse garden bed, featuring tomatoes, melons, sugar beans, and basil. Today, let’s delve deeper into the enchanting realm of successive crops, paying heed to disease prevention, nutrient orchestration, and the delicate symphony of nature’s dance.

Handpicking Your Successive Crops:

As your garden bed gently embraces the legacy of the previous season, a canvas of possibility stretches before you. The art of choosing successive crops is akin to crafting a melodic masterpiece—rooted in practicality yet adorned with strokes of creativity.

Harmonizing with Health: Disease prevention is a maestro’s key note. As the curtains fall on your last act, rotate your crops to thwart the rise of soil-borne adversaries. This dance between tomatoes and melons, now comes the encore, introducing crops from a different botanical tune.

Cultivating Nutrient Refinement: Each plant has its own nutritional rhythm. To conduct a harmonious nutrient orchestra, follow nitrogen-rich performers like sugar beans with starlets that demand a richer tune. Introduce nutrient-hungry protagonists like kale and broccoli to the stage, allowing them to flourish with the legacy of leguminous actors.

Balancing the Garden Opera: Embrace the magic of companion planting, an intricate ballet of interdependence. To repel unwanted pests and entice benevolent pollinators, sow the seeds of marigold and nasturtium alongside your next ensemble. This vibrant display nurtures harmony in your garden symphony.

Suggested Successive Crops:

  1. Leafy Luxuries: As autumn’s curtain rises, introduce the grace of leafy greens—spinach, Swiss chard, and arugula. Their verdant splendor paints a tapestry of nutrition and flavor, aligning gracefully with the aromatic basil that adorns the garden’s edge.
  2. Roots Unearthed: Following the leafy crescendo, welcome root vegetables to the stage. Carrots, radishes, and beets take center stage, tapping into the enriched soil beneath the trellised melody of tomatoes and melons.
  3. Cabbage Chronicles: The plot thickens as brassicas enter the scene—broccoli, cauliflower, and Brussels sprouts. These protagonists, members of the cabbage family, contribute to disease prevention through their captivating choreography of crop rotation.

Practical Guiding Stars:

  1. Soil Serenades: As you prepare for the next performance, compose a prelude of compost or well-aged manure to ensure the soil’s harmonious resonance.
  2. Symmetry in Spacing: Pay heed to the spacing choreography of your chosen crops. Proper spacing orchestrates a dance of adequate airflow, diminishing the risk of discordant diseases.
  3. Mulch’s Melody: A harmonious symphony requires resonance. Mulch takes on the role of conductor, harmonizing moisture, temperature, and weed crescendos. This virtuoso act enlivens the soil’s composition.
  4. Guardians of Harmony: The rhythm of integrated pest management (IPM) is essential. Nurture beneficial insects, practice vigilant surveillance, and conduct the symphony with precision, thwarting the pest cacophony.
  5. Watchful Maestros: Keep a vigilant eye on your verdant masterpiece. Nurture each stanza and note, addressing any concerns in real-time for a harmonious garden.

Curtain Call and Fresh Beginnings:

As you step onto the stage of successive crops, recall that each planting cycle is a passage of renewal and transformation. By selecting crops judiciously, emphasizing disease resilience, and nurturing the delicate balance of nutrients, you’re not merely gardening—you’re composing a garden symphony.

Allow the seasons to guide your cadence and past harvests to infuse wisdom into your journey. As you sow the seeds of your successive crops, envision the forthcoming harvest’s abundance and gastronomic treasures. Until we meet again, fellow gardeners, may your soil sing with vibrancy, your plants flourish, and your connection to the earth deepen—a harmonious ode to growth. Happy planting!

Posted on

From Harvest to Renewal: Planning Your Next Successive Crops

Hello, dedicated gardeners! As the wheel of the seasons turns once more, it’s time to embark on a new chapter in your garden bed’s journey. In our previous posts, we explored the art of cultivating a diverse and fruitful garden bed, from tomatoes and melons to sugar beans and basil. Now, let’s delve into the exciting world of successive crops, focusing on disease prevention, nutrient requirements, and the delicate balance of nature.

Selecting Your Successive Crops:

As you bid farewell to the remnants of your summer harvest, a blank canvas lies before you, ready to be adorned with a new tapestry of flavors. The art of selecting successive crops involves a harmonious blend of pragmatism and creativity.

Disease Prevention: One of the key principles in successive cropping is to minimize the risk of diseases that may have affected the previous crops. Consider rotating crops to prevent the buildup of soil-borne pathogens and pests. For instance, avoid planting crops from the same family as your previous tomatoes to reduce the risk of soilborne diseases that may affect both crops.

Nutrient Requirements: Different crops have varying nutrient needs. To maintain soil fertility and balance, follow nitrogen-fixing crops like legumes (beans or peas) with heavy feeders like leafy greens (lettuce, spinach), which benefit from the nitrogen left behind by the legumes. This practice replenishes nutrients naturally, reducing the need for synthetic fertilizers.

Balancing the Ecosystem: Embrace the principle of companion planting to create a balanced ecosystem in your garden bed. Companion plants can deter pests, enhance pollination, and contribute to overall soil health. For instance, planting aromatic herbs like rosemary, sage, or dill alongside your new crops can help repel unwanted insects and add culinary delights to your table.

Successive Crop Ideas:

  1. Leafy Greens: As the cool embrace of fall settles in, welcome leafy greens to your garden bed. Spinach, kale, and Swiss chard thrive in this season. Their vibrant leaves bring color and nutrition to your table, and they harmonize well with the aromatic basil that remains on the edges of your bed.
  2. Root Vegetables: Follow your leafy greens with root vegetables like carrots, radishes, and beets. These crops make excellent use of the nutrients left behind by the previous plants and benefit from the well-drained soil beneath your melon and tomato trellises.
  3. Cabbage Family: Introduce members of the cabbage family, such as broccoli, cauliflower, and Brussels sprouts. These nutrient-rich crops not only add diversity to your garden bed but also contribute to disease prevention through crop rotation.

Practical Tips for Success:

  1. Soil Preparation: As you prepare your garden bed for the next set of crops, amend the soil with compost or well-rotted manure to ensure a nutrient-rich foundation.
  2. Spacing: Pay attention to the spacing requirements of your chosen crops. Adequate spacing allows for proper airflow and minimizes the risk of diseases.
  3. Mulching: Apply a layer of organic mulch to conserve moisture, regulate soil temperature, and suppress weed growth. Mulching also contributes to soil health as it breaks down over time.
  4. Pest Management: Implement integrated pest management (IPM) strategies, such as regular scouting for pests, encouraging beneficial insects, and practicing proper sanitation to reduce the risk of pest infestations.
  5. Observation: Continuously observe your garden bed, noting any changes in plant health or growth. Early detection of issues allows for prompt intervention and a healthier garden.

In Closing: A Garden’s Renewal:

As you embark on this new phase of your garden’s journey, remember that each planting cycle is an opportunity for renewal and growth. By carefully selecting successive crops, prioritizing disease prevention, and nurturing the delicate balance of nutrients, you’re not just cultivating a garden bed – you’re fostering a thriving ecosystem.

With the seasons as your guide and the lessons from past harvests in your heart, may your garden bed continue to flourish and evolve. As you sow the seeds of your successive crops, envision the abundant harvests and culinary delights that lie ahead. Until next time, fellow gardeners, may your soil be rich, your plants resilient, and your connection to the land deep and meaningful. Happy planting!

Posted on

Maximising Your Single-Row Garden Bed: A Guide to Cultivating Tomatoes, Melons, Sugar Beans, and Basil

Do you have a single-row garden bed and a passion for cultivating an array of delectable crops? Look no further! In this guide, we’ll show you how to optimize your 1-meter-wide, 3-row bed to simultaneously nurture tomatoes, melons, sugar beans, and basil. With a carefully planned layout and the magic of companion planting, you’ll be amazed at the bounty you can yield from this harmonious garden bed arrangement.

The Garden Bed Layout:

Imagine a garden bed where juicy beefsteak tomatoes and succulent melons are the stars of the show, trellised elegantly in the middle of the bed. The outer lines of the bed are adorned with fragrant basil plants and nutrient-rich sugar beans, creating a harmonious blend of flavors and benefits.

Tomatoes and Melons: The Vertical Marvels:

In the heart of your garden bed, construct a sturdy wire trellis using the Florida weave technique. This will provide support and structure for your beefsteak tomatoes and melons, enabling them to reach for the sky and optimizing space utilization.

Companion Planting for Melons:

A key element of successful gardening is companion planting. To enhance the growth and flavor of your melons, consider interplanting them with marigolds. Marigolds deter common pests, such as aphids and nematodes, while their vibrant blooms add a touch of color to your garden bed.

Sugar Beans: Ground Guardians:

Nestled on the outer rows of the bed, sugar beans are the unsung heroes. Their nitrogen-fixing abilities contribute to soil health, benefitting neighboring crops. As they sprawl on the ground, sugar beans provide a natural ground cover, reducing weed growth and conserving soil moisture.

Basil: The Aromatic Protector:

Opposite the tomato plants, the aromatic basil plants play a dual role. Their fragrance helps repel pests that may bother your tomatoes, such as aphids and whiteflies. Plus, they offer a culinary delight, ready to be plucked and used to elevate your dishes.

Succession Planting and Beyond:

As the growing season progresses, your garden bed’s versatility shines through. Once you’ve harvested your bountiful tomatoes and melons, it’s time to plan for the next phase. Follow up with a succession crop, such as fast-growing leafy greens like lettuce or spinach. These cool-season crops will thrive in the enriched soil left behind by your previous plantings.

Caring for Your Multi-Crop Garden:

Maintaining your garden bed is a labor of love. Regularly prune and train your tomato and melon vines along the trellis, ensuring optimal sun exposure and air circulation. Keep an eye out for any signs of pests or disease and address them promptly. Water your crops consistently, aiming for the base of the plants to prevent moisture-related issues.

Harvest and Enjoy:

As the culmination of your efforts, the moment of harvest arrives. Savor the juicy, sun-ripened tomatoes, delight in the sweetness of your melons, and revel in the aromatic essence of basil. Your sugar beans add a nutritious touch to your dishes, enhancing both flavor and texture.

The Garden’s Cycle Continues:

As your growing season comes to an end, take note of the valuable lessons learned from your single-row garden bed experiment. Rotate your crops in the following season to maintain soil health and prevent disease buildup. Consider incorporating cover crops during the off-season to further enrich your soil and enhance its structure.

In the end, your single-row garden bed has proven its potential for diversity and productivity. By strategically combining tomatoes, melons, sugar beans, and basil, you’ve created a symphony of flavors and benefits that showcase the artistry of gardening. So, whether you’re a seasoned gardener or embarking on your first journey, remember that with careful planning, a touch of creativity, and a dash of companionship, your garden bed can flourish beyond your expectations. Happy growing and may your garden thrive!

Posted on

Get rich Farming Cowpeas with Cucurbits and Grains

Cowpeas come in different varieties, some of which are climbing and erect, like Dr. Saunders, while others are creeping, such as Bechuana White. The climbing type is particularly well-suited for use as forage or as a cover crop.

These versatile legumes can be intercropped or rotated with other crops and are known for their ability to tolerate drought. Additionally, cowpeas are a valuable source of protein and enrich the soil by leaving nitrogen behind for subsequent crops. It is estimated that the global annual cowpea crop covers approximately 12.5 million hectares, producing a total of 3 million tons of grain for food consumption.

The leading regions for cowpea production in the world are West and Central Africa, contributing to 64% of the estimated 3 million tons of cowpea seed. Nigeria stands out as the leading cowpea producing country, followed by Brazil. In Australia and Asia, cowpeas are mainly cultivated for fodder, cover crop purposes, or to enhance the soil with nitrogen and nitrogen-fixing microbes. South Africa’s cowpea production is concentrated in the North West, Limpopo, KwaZulu-Natal, and Mpumalanga provinces.

Cowpeas offer various culinary uses. They can be cooked or steamed after soaking in water overnight, and their fresh, immature pods may be boiled as a vegetable. The leaves and growth points are commonly used as a vegetable dish, similar to spinach, and can also be dried and used as a protein substitute. Green cowpea seeds can be roasted and ground as a coffee substitute, while the dried seeds are often mixed with onions and spices and fried in oil.

As for animal feed purposes, cowpeas are used in hay production and to make silage, which is preserved animal feed suitable for use during droughts. Making cowpea silage involves mixing cowpea leaves with the green leaves of maize or sorghum, compacting the green matter, covering it with plastic, and weighing it down to make it airtight. The mixture is then left to ferment.

Cowpeas are particularly valuable for animal feeding, with good yields of high-quality dry matter. Under dryland conditions, yields of cowpea forage can range from 2 to 3 tons of dry matter per hectare, while in irrigated areas, yields of up to 8 tons of dry matter per hectare have been recorded. The best feeding value for animals is achieved when cowpeas are intercropped with maize. Local farmers who harvest and store cowpea fodder during the dry season can earn up to 25% of their annual income by selling it as fodder.

Posted on

Crude Protein in Forages

Crude protein (CP) is a measure of the nitrogen content in forages. It is not a direct measure of the amount of protein available to animals, but it can be used to estimate the amount of true protein and non-protein nitrogen.

CP concentration varies by season and maturity. Cooler environments will produce forages with higher levels of CP as compared to warmer months. CP also decreases as the forage ages and fiber content increases, and in excessively rainy conditions where nitrogen is leached out after the forage has been cut.

There are many factors that can affect the CP content of forages, including the species of plant, the soil fertility, and the management practices used. For example, legumes typically have higher CP levels than grasses. Soils that are high in nitrogen will also produce forages with higher CP levels.

The amount of CP that an animal needs depends on its age, weight, and stage of production. Forages with low CP levels may need to be supplemented with protein sources, such as soybean meal or cottonseed meal.

Climate and Harvest Effects on Crude Protein

The climate can have a significant impact on the CP content of forages. Cooler environments typically produce forages with higher CP levels than warmer months. This is because cooler temperatures favor the growth of legumes, which are higher in protein than grasses.

The harvest stage of the forage can also affect its CP content. Forages that are harvested early in the growing season will have higher CP levels than those that are harvested later. This is because the protein content of forages typically decreases as they mature.

Managing Forage CP

There are a number of management practices that can be used to manage the CP content of forages. These include:

  • Choosing the right species of plant. Some plants, such as legumes, are naturally higher in protein than others.
  • Fertilizing the soil. Soils that are high in nitrogen will produce forages with higher CP levels.
  • Timing the harvest. Forages that are harvested early in the growing season will have higher CP levels than those that are harvested later.
  • Managing pests and diseases. Pests and diseases can reduce the CP content of forages.

By following these management practices, you can help to ensure that your animals have access to forages with adequate CP levels.

Conclusion

CP is an important nutrient for animals. It is used to synthesize proteins, which are essential for growth, maintenance, and reproduction. The CP content of forages varies by season, maturity, and management practices. By following good management practices, you can help to ensure that your animals have access to forages with adequate CP levels.

How to measure crude protein?

Crude protein (CP) is a measure of the nitrogen content in a food or feed. It is not a direct measure of the amount of protein available to animals, but it can be used to estimate the amount of true protein and non-protein nitrogen.

There are two main methods for measuring CP: the Kjeldahl method and the Dumas method.

The Kjeldahl method is the most common method for measuring CP. It involves digesting the sample with sulfuric acid in the presence of a catalyst, such as copper sulfate or mercury sulfate. The nitrogen in the sample is converted to ammonia, which is then distilled and titrated with a standard acid solution. The amount of acid used to neutralize the ammonia is a measure of the nitrogen content of the sample.

The Dumas method is a newer method for measuring CP. It involves combusting the sample in an oxygen atmosphere. The nitrogen in the sample is converted to nitric oxide, which is then absorbed in a solution of potassium hydroxide. The amount of potassium hydroxide used to absorb the nitric oxide is a measure of the nitrogen content of the sample.

The Kjeldahl method is more accurate than the Dumas method, but it is also more time-consuming and expensive. The Dumas method is less accurate, but it is faster and less expensive.

The following are the steps involved in measuring CP using the Kjeldahl method:

  1. Weigh out a known amount of the sample.
  2. Place the sample in a Kjeldahl flask with sulfuric acid and a catalyst.
  3. Heat the flask until the sample is digested.
  4. Cool the flask and add a small amount of sodium hydroxide solution.
  5. Distill the ammonia from the flask.
  6. Titrate the distillate with a standard acid solution.
  7. Calculate the amount of nitrogen in the sample.

The following are the steps involved in measuring CP using the Dumas method:

  1. Weigh out a known amount of the sample.
  2. Place the sample in a combustion chamber.
  3. Combust the sample in an oxygen atmosphere.
  4. Collect the nitric oxide produced in the combustion.
  5. Absorb the nitric oxide in a solution of potassium hydroxide.
  6. Calculate the amount of nitrogen in the sample.

The results of CP measurements are typically expressed as a percentage. For example, a sample with a CP content of 10% would contain 10 grams of nitrogen per 100 grams of sample.

The accuracy of CP measurements depends on a number of factors, including the quality of the reagents used, the skill of the technician, and the condition of the equipment.

CP measurements are important for a variety of purposes, including:

  • Determining the nutritional value of foods and feeds
  • Monitoring the quality of food products
  • Ensuring that animal feed meets nutritional requirements

Explain the Titration process

Sure, here is an explanation of the titration process:

Titration is a technique used to determine the concentration of an unknown solution. It involves adding a known volume of a solution of known concentration (the titrant) to a known volume of the unknown solution (the analyte) until the reaction between the two solutions is complete. The point at which the reaction is complete is called the equivalence point.

The titration process is typically carried out using a burette to deliver the titrant. The burette is a graduated glass tube with a stopcock at the bottom. The stopcock is used to control the flow of the titrant.

The analyte is placed in a conical flask. An indicator is added to the analyte. The indicator is a substance that changes color when it reacts with the titrant. The color change indicates that the equivalence point has been reached.

The titrant is added to the analyte slowly, drop by drop, until the indicator changes color. The volume of the titrant added at the equivalence point is the amount of titrant that was needed to react with the analyte.

The concentration of the analyte can be calculated from the volume of the titrant added and the concentration of the titrant.

Here are the steps involved in the titration process:

  1. Prepare the burette.
  2. Add the analyte to the conical flask.
  3. Add the indicator to the conical flask.
  4. Zero the burette.
  5. Start adding the titrant to the conical flask, drop by drop.
  6. Observe the color of the indicator.
  7. Continue adding the titrant until the indicator changes color.
  8. Record the volume of the titrant added.
  9. Calculate the concentration of the analyte.

The titration process is a very accurate way to determine the concentration of an unknown solution. It is a common technique used in chemistry and other scientific fields.

Here are some of the advantages of using titration:

  • It is a very accurate method of analysis.
  • It is a versatile method that can be used to determine the concentration of a wide variety of substances.
  • It is a relatively simple method to perform.

Here are some of the disadvantages of using titration:

  • It can be a time-consuming process.
  • It requires the use of specialized equipment.
  • It can be dangerous if the chemicals involved are not handled properly.

What Is the chemical formula for ammonia?

The chemical formula for ammonia is NH3. It is a compound of nitrogen and hydrogen with the formula NH3. A stable binary hydride, and the simplest pnictogen hydride, ammonia is a colourless gas with a distinct pungent smell. Biologically, it is a common nitrogenous waste, particularly among aquatic organisms, and it contributes significantly to the nutritional needs of terrestrial organisms by serving as a precursor to 45% of the world’s food and fertilizers. Around 70% of ammonia is used to make fertilisers in various forms and composition, such as urea and diammonium phosphate. Ammonia in pure form is also applied directly into the soil.

The ammonia molecule consists of one nitrogen atom and three hydrogen atoms in a trigonal pyramid shape. A lone pair on the nitrogen atom can accept a proton to form an ammonium ion (NH4+). The properties of ammonia include:

  • Melting point: −77.73 °C (−110.92 °F)
  • Boiling point: −33.34 °C (−28.012 °F)
  • Density: 0.771 g/L (at STP)
  • Soluble in water: 1.51 g/L (at STP)
  • Odor threshold: 5 ppm

Ammonia is a very important compound with a wide range of uses. It is used in fertilizers, plastics, cleaning products, and explosives. It is also used as a refrigerant and a solvent.

Posted on

Why use irrigation taps?

GroSpace - Ball valve

Irrigation taps offer several advantages and are commonly used for various purposes in gardening, landscaping, and agricultural settings. Here are some key reasons why you would use irrigation taps:

  1. Efficient Water Distribution: Irrigation taps allow for controlled water distribution, ensuring that plants receive the right amount of water they need. By connecting the tap to your water source, such as a garden hose or irrigation system, you can easily regulate the flow of water to provide optimal irrigation. This helps prevent overwatering or underwatering, promoting healthier plant growth and reducing water wastage.
  2. Customizable Watering: With irrigation taps, you have the flexibility to adjust the water flow according to the specific needs of different plants or areas in your garden. Whether you have delicate seedlings that require a gentle mist or established plants that need a steady stream, irrigation taps allow you to customize the water output. This precision in watering ensures that each plant receives the appropriate amount of water for its growth stage and requirements.
  3. Water Conservation: Irrigation taps contribute to water conservation efforts by promoting efficient water usage. The ability to control the water flow and shut off the tap when not in use helps prevent unnecessary water wastage. By using irrigation taps, you can reduce water consumption, lower your water bills, and minimize the environmental impact associated with excessive water use.
  4. Convenience and Time-Saving: Using irrigation taps simplifies the process of watering your plants. Instead of manually carrying water or relying on inefficient watering methods, you can easily connect your irrigation system or garden hose to the tap. This saves time and effort, particularly for larger gardens or agricultural fields, where manually watering each plant can be time-consuming.
  5. Versatility: Irrigation taps are versatile and can be used in various settings. Whether you have a small garden, a commercial farm, or a landscaping project, irrigation taps can be integrated into different irrigation systems or setups. They are compatible with different types of hoses, pipes, and connectors, allowing for seamless integration into your existing irrigation infrastructure.
  6. Better Plant Health: Proper and consistent irrigation is crucial for maintaining the health and vitality of your plants. Irrigation taps enable you to deliver water directly to the root zone of the plants, promoting healthy root development and efficient nutrient uptake. This targeted watering helps prevent diseases caused by excessive moisture on leaves or surface-level watering.

Overall, irrigation taps provide a convenient, efficient, and customizable solution for watering plants. They promote water conservation, save time, and contribute to healthier plant growth. Whether you are a home gardener or a professional in the agricultural industry, irrigation taps are a valuable tool for effective and controlled irrigation.

Are irrigation taps effective for vegetable production?

Yes, irrigation taps are highly effective for vegetable production. Vegetables generally have specific water requirements, and using irrigation taps allows you to deliver water directly to the root zone of the plants, ensuring efficient and targeted irrigation. Here are some reasons why irrigation taps are beneficial for vegetable production:

  1. Precise Watering: Different vegetables have varying water needs, and irrigation taps enable you to adjust the water flow and provide the right amount of water for each vegetable variety. This precision in watering helps prevent overwatering or underwatering, which can negatively impact plant health and yield. By delivering water directly to the root zone, you optimize water uptake and promote healthy growth.
  2. Consistent Moisture Levels: Vegetables often require consistent soil moisture levels to thrive. Irrigation taps allow you to maintain consistent moisture in the root zone, which is especially important during critical growth stages such as germination, seedling establishment, flowering, and fruit development. Consistent moisture helps prevent stress, blossom-end rot, cracking, and other water-related issues that can affect vegetable quality.
  3. Water Efficiency: Irrigation taps provide efficient water usage, reducing water wastage compared to traditional watering methods. The controlled flow and on/off functionality of the taps ensure that water is used only when needed. By avoiding surface-level watering or excessive runoff, you optimize water conservation efforts and minimize water loss.
  4. Disease Prevention: Proper irrigation is crucial for minimizing the risk of diseases in vegetable crops. Irrigation taps allow you to avoid wetting the foliage, which can promote the spread of fungal and bacterial diseases. By delivering water directly to the root zone, you reduce leaf moisture and decrease the likelihood of disease development, resulting in healthier plants and higher yields.
  5. Time and Labor Savings: In vegetable production, where large areas or multiple beds need to be irrigated, using irrigation taps saves time and reduces labor requirements. Instead of manually watering each plant or bed, you can set up an irrigation system with taps strategically placed throughout the growing area. This allows for efficient irrigation and frees up time for other essential tasks in vegetable cultivation.
  6. Scalability: Whether you have a small vegetable garden or a larger-scale agricultural operation, irrigation taps can be scaled and integrated into various irrigation systems. They can be incorporated into drip irrigation systems, soaker hoses, or sprinkler setups, adapting to the specific needs of your vegetable crops.

In summary, irrigation taps are highly effective for vegetable production. They provide precise watering, promote water efficiency, prevent diseases, save time and labor, and offer scalability for different production scales. By using irrigation taps, you can optimize irrigation practices and support the healthy growth and abundant yield of your vegetable crops.

Posted on

Why Staking Tomatoes is Important

GroSpace - Tomato Stake

Growing tomatoes is a rewarding experience, but it can also be challenging. One of the most important things you can do to ensure a successful tomato harvest is to stake your plants. Staking tomatoes helps to keep them upright and supported, which can prevent them from rotting or developing diseases. It also makes them less accessible to garden pests and insects. Additionally, staking makes it easier to access all parts of the plant for trimming and harvesting.

When it comes to growing tomatoes, staking is a common practice used to support the plants and promote healthy growth. Staking involves securing the tomato plants to a vertical structure, preventing them from sprawling on the ground and improving air circulation around the foliage. There are several types of stakes commonly used for tomatoes, each with its advantages and considerations. Here are some popular options:

  1. Wooden Stakes: Wooden stakes are the most traditional and widely used supports for tomato plants. They are typically made of bamboo, cedar, or other durable wood. Wooden stakes are sturdy and provide reliable support for tomato plants. They can be easily driven into the ground near the plants, and the vines can be tied to the stakes using twine or soft strips of cloth. One consideration with wooden stakes is that they may rot over time due to exposure to moisture and soil.
  2. Metal Stakes: Metal stakes, such as steel or galvanized iron, are durable and long-lasting options for supporting tomato plants. They are more resistant to rot and can withstand harsh weather conditions. Metal stakes are available in various sizes and thicknesses, allowing you to choose the appropriate strength for your tomato plants. Like wooden stakes, the vines can be tied to the metal stakes using twine or clips.
  3. Tomato Cages: Tomato cages are structured supports that resemble cylindrical or conical cages. They are often made of galvanized steel or heavy-duty wire mesh. Tomato cages offer 360-degree support for the plants, allowing them to grow vertically while preventing them from falling or bending under the weight of the fruit. As the plants grow, the vines naturally weave through the cage openings. Tomato cages are easy to set up and can be reused for multiple growing seasons.
  4. Trellises: A trellis is a framework of vertical and horizontal supports that creates a lattice-like structure. It provides a sturdy system for training tomato vines to grow vertically. Trellices are typically made of wood, metal, or plastic. The tomato plants are tied or clipped to the trellis as they grow, allowing them to climb and spread out while receiving support. Trellices are ideal for indeterminate tomato varieties, which can grow quite tall and benefit from the vertical growth space.
  5. String or Florida Weave: The string or Florida weave method involves setting up a series of stakes at regular intervals along the row of tomato plants. A strong twine is then woven between the stakes, creating a horizontal support system. As the tomato plants grow, their vines are gently woven through the twine, providing support. This method is particularly useful for commercial tomato farming or large-scale cultivation, as it allows for efficient maintenance and harvesting.

The choice of stake depends on various factors, such as the tomato variety, plant size, growing conditions, personal preference, and available resources. Regardless of the stake type, it’s important to ensure the plants are adequately supported, allowing for proper growth, air circulation, and easy access for maintenance and harvesting.

How to Stake Tomatoes

Staking tomatoes is a great way to keep them healthy and productive. It helps to support the plants, prevent them from rotting or developing diseases, and make them less accessible to pests and insects.

There are many different ways to stake tomatoes. You can use wooden stakes, plastic stakes, or bamboo stakes. The type of stake you choose will depend on your personal preference and the size of your tomato plants.

Here are the basic steps on how to stake tomatoes:

  1. Choose a sturdy stake that is at least 6 feet tall.
  2. Push the stake into the ground at least a foot deep.
  3. Tie the tomato plant to the stake using a bit of twine, string, or old pantyhose.
  4. Tie the plant loosely to allow for growth.
  5. Check the ties regularly and adjust them as needed.

Here are some additional tips for staking tomatoes:

  • Remove any dead or diseased leaves from the plant.
  • Fertilize the plant regularly.
  • Water the plant deeply and regularly.
  • Harvest the tomatoes when they are ripe.

With a little care and attention, you can easily stake your tomatoes and enjoy a bountiful harvest.

Benefits of Staking Tomatoes

Staking tomatoes offers several benefits that contribute to healthier plants, improved fruit quality, and easier maintenance. Here are some key advantages of staking tomatoes:

  1. Support for Plant Growth: Staking provides structural support to tomato plants, especially indeterminate varieties that can grow tall and produce abundant foliage. By staking the plants, you prevent them from sprawling on the ground, reducing the risk of disease, pests, and rot. Vertical growth allows better access to sunlight and air circulation, promoting overall plant health and vigor.
  2. Enhanced Air Circulation: Staked tomatoes have better air circulation around their foliage, which helps in preventing the development of fungal diseases, such as blight or mildew. Good air movement reduces humidity levels, allows leaves to dry faster after rain or watering, and minimizes the chances of diseases spreading through contact.
  3. Disease Prevention: By keeping the tomato plants off the ground, staking can help reduce the risk of soil-borne diseases. Fungal pathogens and bacteria present in the soil are less likely to splash onto the leaves and infect the plants. Staked plants also experience fewer issues with soil-borne pests like slugs or rodents that may damage the fruit.
  4. Improved Fruit Quality: Staking encourages better fruit development and quality. With proper support, the weight of the fruit is evenly distributed, reducing the likelihood of fruit rot or deformation. Staked tomatoes tend to have fewer blemishes, as they are less prone to contact with soil, stones, or other debris that may cause damage.
  5. Easy Maintenance and Harvesting: Staked tomato plants are more accessible, making routine maintenance tasks, such as pruning, tying, and removing suckers, more convenient. It becomes easier to identify and address any issues like pest infestations or diseased foliage. Harvesting becomes simpler too, as the fruit is elevated and visible, allowing for easier picking without bending down or searching through foliage.
  6. Space Optimization: Staking tomatoes is particularly beneficial in small gardens or limited growing spaces. By training the plants vertically, you optimize space utilization, allowing for increased plant density and maximizing the number of tomato plants you can grow within a given area.
  7. Aesthetic Appeal: Staked tomatoes often have a neater and organized appearance compared to sprawling plants. The vertical growth and well-supported vines contribute to an aesthetically pleasing garden or growing area.

It’s worth noting that determinate tomato varieties, which tend to be bushier and have a predetermined height, may not require staking. However, staking can still be beneficial in providing some support and improving airflow around the plants.

Overall, staking tomatoes promotes healthier growth, disease prevention, improved fruit quality, and ease of maintenance, ultimately leading to a more successful tomato harvest.

When to Stake Tomatoes

The best time to stake tomatoes is when they are young and still relatively small. This will help to prevent the plant from becoming too top-heavy and will make it easier to stake.

Additional Tips

  • Use a sturdy stake that is at least 6 feet tall.
  • Tie the tomato plant loosely to the stake to allow for growth.
  • Check the ties regularly and adjust them as needed.
  • Remove any dead or diseased leaves from the plant.
  • Fertilize the plant regularly.
  • Water the plant deeply and regularly.
  • Harvest the tomatoes when they are ripe.

With a little care and attention, you can easily stake your tomatoes and enjoy a bountiful harvest.